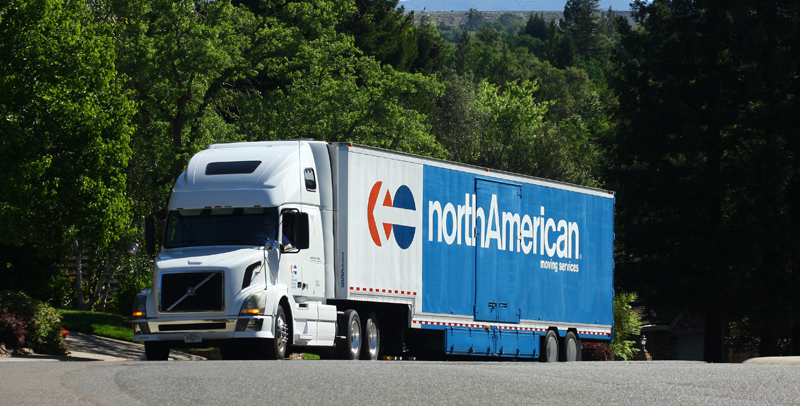
Tips for Moving in Bad Weather

When it comes to moving days, we all hope for the best weather. Unfortunately, things don’t always work out that way. And with a heavy rainy season in locations like Vancouver, it often isn’t practical to reschedule your move with professional movers. With that in mind, here are helpful tips to make your move during bad weather the best it can be:

Prior Planning

One of the most important things you can do is to have a plan in place as well as a back-up plan in case something goes wrong. Know the general weather conditions and make general plans accordingly. Look at the advanced weather forecast to get an idea of what it will look like. Obviously, this can change, but you can still get a plan in place.

Prepare the New House

It’s not enough to get your old house and belongings ready for the move. You also want to have your new home ready, especially for inclement weather. Make sure that your power is turned on and the HVAC is working. If it’s a scorching summer, you want the air blasting and conversely you want the heater going if you are moving in the dead of winter with snow and ice. Also, stock up on a change of clothes at your new home in case you get soaked in a thunderstorm. Have floor mats down on tile floors so that people with wet shoes from the outside don’t slip as they bring in boxes. And have hot coffee or cold water ready for your professional movers. Trust us when we say it will be appreciated.

Pack Accordingly

Ultimately, it’s impossible to predict the weather 100% of the time. That’s why you should pack as if the weather could turn bad at a moment’s notice. This means using durable and tough moving products such as rugged moving boxes. These should be reinforced and not  flimsy, recycled boxes from the local grocery store dumpsters. If these older, reused boxes get wet (from a heavy thunderstorm) then you could end up with your valuables crashing through the wet and torn boxes. Also, be sure that you don’t overpack boxes. This is always a good idea, but definitely one you want if you could have to move in a downpour. Professional movers will make sure everything they’re moving is wrapped and carefully transported but you must also think about when you’re moving boxes and unpacking in your new home.

Use Garbage Bags

Another way that you can help protect your belongings during a rainstorm iis to use garbage bags. If you have delicate items that you want to protect, you can wrap them up in plastic garbage bags. If you aren’t using wardrobe boxes to hang your clothes, then you can poke your hangers through the bags and keep your clothes dry as you have them moved.

Label Appropriately

If you’re having your movers handle items like electronics during a rainstorm, make sure they are clearly labeled. Obviously, you don’t want these items getting wet and extra care can be taken to ensure that they stay safely out of the rough weather.

Create Backup Plans for Your Move and You’ll Have Nothing to Worry About

Moving days are stressful enough in the best of conditions. But if you are moving in bad weather, it can be especially rough. Planning ahead of time can alleviate a lot of the problems that may come up to make any move a smooth one.

Use Experienced, Professional Movers Who Know Your Area

Crescent Moving & Storage has been in business for over 40 years providing reliable, timely and safe moving services for businesses and homeowners in the Vancouver area. Rain or shine, we’re there for you! Find out why so many trust Crescent Moving to care for their most valuable assets. Contact us for a FREE , no-obligation moving quote.

What Can’t You Move with Movers?

You may not realize there are items that can’t be moved by professional movers. Here’s a list to help you prepare properly for your move in Canada.

What you can't move with movers

Professional movers do the hard work and heavy lifting of relocating so we don’t have to. They’ve probably saved quite a few people from losing their tempers and blowing up. Unfortunately, there are some things that even movers can’t do. Either because of laws or regulations, there are certain items that professional movers are not allowed to transport.
Before your next move, take a look at this list so you can plan to throw them out or pack them up and move them yourself:

Perishable Food (and Liquor) — File these under the heading of “check first.” Some companies will not ship food at all, while others will only ship non-perishable items. When it comes to liquor, most will not ship open containers. However, some movers will ship bottles provided they are unopened and packed properly. If you’ve got a collection of fine wine or hundred-year-old Scotch, most movers will take a pass on these items because of the insurance liability.
Chemicals or Other Hazardous Materials — Another item on the “no pack” list would be chemicals or hazardous materials. This usually comes with items like gas-powered tools. Lawnmowers, chainsaws and other such equipment should have the gasoline drained before packing them up for a move. Similarly, you can’t transport chemicals such as cleaning supplies as these may not be stable in extreme heat (like in the back of a moving van).

Pets and Plants — No matter how sweet your animals are, there is no reason that they should be placed in a moving van. These vans are great for transporting items, but they don’t have the proper ventilation and heating/air conditioning for your pets. The same goes for plants. These aren’t usually taken for smaller moves either because they can’t guarantee the plants won’t die during the move.

Crescent Movers and Storage is ready to help you move. We provide support throughout your move. With over forty years of experience, we can ensure moving your belongings is one less thing to worry about.

Ready to find a BBB-accredited and certified moving company in Canada?
Contact us today for a virtual moving quote. As part of our new moving guidelines, we are offering optional virtual moving quotes in order to keep our customers and staff safe. Moving consultations can be done over the phone or through an online video conferencing program. This limits the face-to-face contact between our staff and your family. If you’re looking for a quote on moving costs, you can fill out the form on our website. We can provide an accurate and no-obligation estimate without coming to your house

7 Steps To Importing A Vehicle Into Canada From The USA

The first step to Importing a vehicle to Canada is to check if your car is admissible into Canada. You need to make sure that the Registrar of Imported Vehicles (RIV) and Transport Canada has deemed your car allowable to import.

Registrar of Imported Vehicles: https://www.riv.ca/

Image of Vehicle

Many cars can be imported  “as is,” while some will need metric odometers installed and daytime running lights added. There is a comprehensive list of what you can and cannot bring over the border.

Please note that there is no mention on that list of any cars older than 15 years That’s because all cars 15 years old or older are completely exempt from these rules. So if you have a classic car to import, don’t worry about the list.

You still need to fill out the forms, though.

On the website, go to “Online Portal” and then “Create an E-Form”

https://www.riv.ca/OnlineForms/Home/Landing

Register with them. That way, they will email you the completed import form.

Create a New Form.

NOTE: You will need lots of information about the car: Milage etc. Take a photo of that sticker that is inside the driver’s door. The form will ask for information that can be found on it as well.

When they email you the form hold on to it and show it to the Canadian border people.

Step 2: Check the title

The title is the single most important document when importing a car. A title proves ownership of the car. Without a title, in the eyes of the law, you don’t own the car you’re importing. The car must have a clear title to import. You cannot import a vehicle that you are making payments on.

Step 3: Check for Recalls

Check to see if there are any recalls on your vehicle.  Go to https://vinrcl.safercar.gov/vin/ and you can check by VIN number.

You can print (or screenshot) the results.  Just hold on to it with the paperwork from RIV. 

Step 4: Getting an ITN

You must have an ITN to export a car and there are two ways to get one: Be a professional, licensed importer, or pay one. (It is much, much easier to pay one)

I recommend Simplified Trade Solutions:  https://simplifiedtradesolutions.com/

Just fill out the form on their website and they will email you a ITN number within a day or so. Pay by credit card when you get the form.

They have extensive information and instructions on their website for each of the border crossings.

They also have hours and email addresses for each.  (Just because the border crossing is open 24/7 doesn’t mean the export office is)

You must decide in advance which border crossing you will use and the approximate date.

They also have a link on their site for the Vehicle Export Cover Sheet.  There is a field on this worksheet for the ITN number.

Step 5: The 72-hour export rule

Before you can import into Canada you have to export it from the U.S. You must email the paperwork to the exact U.S. border crossing you will be using at least 72 hours before you show up with a car to be exported You will need to send them at least the following:

  • A digital scan of the front and back of the title
  • A completed Vehicle Export Worksheet

(Certain border crossings require additional paperwork.  Again, that information is on the Simplified Trade Solutions website)

They will reply by email if they need anything further or if you are approved and ready to go.

Step 6: The export

If you’ve already sent your paperwork ahead at least 72 hours in advance, you have a clean title in hand and the Vehicle Export Worksheet, then you are ready to export. Be sure to have the original hard copy of your title with you. Once you start this process, you cannot stop it.  You must export and import to Canada

Step 7: Import and tax

Upon driving through the Canadian customs gate, inform them that you are importing a car and they’ll direct you to an easy-to-find spot where you can park and then head inside to pay taxes. How much tax? If the car is newer than 15 years you will pay GST (and HST, depending on your province of entry) for the full amount of the vehicle as listed in the bill of sale. Customs will always fuss over the amount. Bring anything you can use to prove that you paid what you paid. Once the car is legally into the country, you have 90 days to actually go to a registry where you can register and plate the car.

Organized Moving Like the Pros

If you’ve moved more than once, you’re probably thinking, “How do the pros move?”. It would seem there has to be a secret formula to moving as so many do it easily and without incident.


The pros, as it turns out, actually do have tips that can make moving slightly less stressful, but even they acknowledge that going from one place to another and creating a whole new “home” experience is intense.
Did you get caught up in the Marie Kondo Netflix special for organizing your home? Well, Netflix has done it again by adding The Home Edit with expert home organizers Clea and Joanna. These ladies take celebrities and Regular Joe’s through organizing their homes.In one episode, Joanna mentions how important it is to unpack right away after moving. This is, of course, after having performed your edit. “Edit” means that you go through all your belongings to decide if you’re going o donate, throw out or keep the item.
Here’s 6 moving tips the pros use:

Start With Your Edit – The first step the ladies recommend is the aforementioned “Edit.” Go through each room and open up everything—all the closets, cabinets, drawers, and storage areas. Look at the items and determine if you still use it or if you even like it. If not, decide if you want it because of sentimental reasons. If an item doesn’t meet any of these criteria, then you need to get rid of it. This means, you should either trash it, donate it, or put it into a yard sale. But it also means that you will have MUCH less to pack.

Next, Pre-Organize – The next step in getting ready for a move is something that Clea and Joanna call the “Pre-Organize.” Before you begin to pack, organize your items that you plan on packing into specific areas. For instance, put all your cleaning supplies into clear plastic bins that are clearly labeled. Remove everything from your drawers and use inserts into them to help stack and organize the items as you put them back in. When it comes to clothes, put them on hangers neatly so that they are hanging correctly. All of this will make it easier to organize your items as you move.

Prepare An Away Space – One of the big suggestions the ladies of The Home Edit make when setting up your new home is to set up an “away” system for your work. So many of us are working from home today and it feels like we never get off the clock. When you’re planning out your new home, you need to plan an area for your work that you can put away when you are done. This can be a roll-top desk that you simply close up when you are done or a portable computer cart that you can roll into a closet when finished. But regardless of how you set it up, you need something that you can close off to keep you from working all the time.

Pack Your Old Home – Now that you have your planning done, it’s time to start packing up the old house. Pack each room separately. You might be tempted to mix items up in boxes trying to fill the boxes up. Don’t do it! Instead, keep all your bedroom items in one set of boxes, all of your kitchen items in another set, and so on.

Also, as you pack them, label the boxes “Kitchen _____ of _____.” Then, when you have the entire room packed, fill in the blanks with the total number of boxes you packed for that room. This way, you can make sure that you get all the boxes in the right room before you start to unpack. You can even number them according to the most important items first that you need to unpack ASAP.

Unpack Quickly! – When you move into your new home, the first thing you want to do is unpack as quickly as possible. This is not the time to organize—that comes next. For now, you just want to get the boxes emptied out and then try to organize everything afterwards.

Now You’re Ready To Organize – And, of course, that means you should now start organizing your new home. Clea and Joanna suggest starting with small goals. For instance, just focus on organizing one drawer or shelf at a time. Go to the store and buy whatever you need to organize that one item. If you aren’t sure what will work best, they also suggest buying a couple of different bins or organizing inserts so that you can get the best fit. If one of them doesn’t work, you can always return it or try it out on another organizing project.

Move It Like the Pros Do
When people move, it can be very frustrating to find that your new home is just as cluttered and disorganized as your old one. By following these steps, you can clear the clutter, move easier, and then get reorganized once you make the big move.
How Can Your Local Canadian Move Go Even Easier? Hire the Best!
Crescent Moving & Storage has been in business for over 40 years providing reliable, timely and safe moving services for businesses and homeowners in the Vancouver area. Find out why so many trust Crescent Moving to care for their most valuable assets. Contact us for a FREE , no-obligation moving quote.

How to Best Pack Your Clothes for a Move

It seems that you never really know just how much “stuff” you own until you try to pack it all up for a move to a new home. And this is especially true when it comes to clothes. 

When you stare at your closet or your chest of drawers, it can sometimes be daunting to think about where to even begin with the task of packing them. But the good news is that there is a system you can use to make the process a little easier. 

Here are 6 tips to pack up your clothes neatly and efficiently for your move:


Don’t move them all — The first thing you need to do is realize that you shouldn’t move all of your clothes. Start out the process by clearing out anything that you don’t really want to keep. If it’s outdated, no longer fits or you haven’t worn it in forever, then donate it.

Make sure they are clean — Once you know what you are going to pack, you should make sure to wash everything before you pack it up. If you’ve had clothes in storage for a while, they may smell musty and packing them up with the rest of your clothes may make the others smell as well. So, starting off fresh and clean is a great idea.

Don’t empty the drawers — Now that you’ve got everything nice and clean, place it back into their drawers and leave them there. It is easier to move them if you just leave them in the drawers and cover them with cling wrap. Then, you can move your clothes without having to pack them into boxes and then unpack them when you get to your new home.

Get wardrobe boxes — If you’ve never seen these little items, they are GREAT. A wardrobe box is a cardboard moving box that is generally around three feet tall. At the top of the box is a rod that you use to hang your clothes. All you have to do is take the clothes (with hangers) out of your closet and hang them on the rod. You don’t have to take them off the hanger, fold them or pack them. Just hang them up, seal the box, and then take them with you.

Grab a suitcase — Your suitcases will have to go with you to your new home and there is no reason why they should go empty. Another great way to move your clothes is to pack them into your suitcase like you are going on a trip, then simply load them up instead of having to use more boxes.

Let your clothes work for you — Consider using your clothes as packing material. Your old t-shirts and fluffy comfy sweaters can make for great packing material to protect your breakables. Simply take something like a mirror or vase and wrap them in your clothing and you can take your clothes with you and not have to spend as much on packing materials.

Use the Clothes Packing Method That Best Suits You

There is no single best way to pack your clothes for a new move. But if you do some (or all) of these items, you can be sure to make the process a lot easier. Definitely consider investing in wardrobe boxes and moving cling wrap and whatever you do, don’t just throw your clothes into trash bags that will rip and tear as soon as you move. 

For More Help with Your Canadian Move

For more tips that will help you move locations in Canada, contact BBB-accredited Crescent Moving and Storage. By filling out a form on our website, we can give you a virtual moving quote. Moving consultations can be done over the phone or through an online video conferencing program. This limits the face-to-face contact between our staff and your family. We can provide an accurate and no-obligation estimate without coming to your house.

5 Tips to Save on Moving Costs

Moving into a new home is never an easy proposition, but sometimes it can also be a hit to the wallet. Buying a home, of course, has all kinds of additional costs from closing fees to the down payment. Renting a home also comes with added costs such as utilities and security deposits. That’s why it’s important to save as much money as possible when it comes to the move itself. 

5 Tips to Save Money

Here are 5 great tips on how to save money when to moving into your new home:


Get rid of as much stuff as possible — Professional movers tend to charge by the hour, so if you want to save money you can start by reducing how long it takes to move you. One way to do this is to do a major purge of your belongings before you move. We recommend doing a room-by-room approach. When you’re coming to each room, separate your items into three stacks: To Pack, To Donate, and To Trash. If you can even get rid of a few items in each room, you will save yourself in the long run and (if you can donate the items) even possibly earn yourself a tax deduction with the items.

Pack creatively — Another way to save time on your move (and therefore money) is to reduce the number of packages you have to pack. No, we aren’t saying to pack your boxes to the point of bursting. That’s going to cost you in the long run when the boxes break. Instead, get creative on the way you pack. For instance, don’t empty your dressers and pack all of your clothes separately. Instead, pull out the drawers and wrap them with plastic wrap with the clothes still inside. Also, pack fragile items with towels and blankets that you will have to move anyway. In this way, you combine some of your packing jobs and save yourself some money.

Don’t forget the free boxes — Although we are big fans of using traditional moving boxes, we know that some people want to save money with these purchases. If that’s you, try hanging out at the local package shops and grocery stores to get free boxes when they toss them out. Another option is to look at rental services that let you rent plastic moving bins instead of having to pay for the boxes.

Shop around — Not all moving companies are the same. If you want to ensure that you’re saving money on your move, get price quotes from all of the local companies. Find out if they offer discounts depending on the day of the week. Fridays and Saturdays are always the biggest moving days, so if the company offers a discount for taking a “slow day” such as a Monday or Tuesday, then it might be in your best interest to be flexible.

Be sure to compare apples to apples here during your search. Not all moving companies are created equal and while some companies will have low fees, it’s important that you find a well-established moving company that has a great reputation. Moving is when you need to know your furniture and important items will be handled with care and moved professionally.

Read the fine print — When you’re shopping around for relocators, read the fine print of your contract. Some companies will charge lots of “extras” that you may not necessarily need (or even use). Be sure that you know where all of your money is going with the move and don’t sign on the dotted line if you are being charged more for what should be basic delivery items.

Enjoy Your Moving Day Without Worrying About Your Finances

Moving might not be a fun experience, but it also doesn’t have to be that expensive of one. If you plan and prepare ahead of time, you’ll find that there are several ways to limit your moving budget so that you can save your cash for other things that you will need after your move is complete.

Are you ready to find a BBB-accredited and certified moving company in Canada? 

Contact us today for a virtual moving quote. As part of our new moving guidelines, we are offering optional virtual moving quotes in order to keep our customers and staff safe. Moving consultations can be done over the phone or through an online video conferencing program. This limits the face-to-face contact between our staff and your family. If you’re looking for a quote on moving costs, you can fill out the form on our website. We can provide an accurate and no-obligation estimate without coming to your house.

Baby proof Your House Before Your Move

If you’re moving into a new home, you already have the excitement ahead of you for a fresh start. But if you’re making the move with a baby, this is compounded with excitement and, perhaps, tinged with a little bit of fear. 

baby proof before you moveCertainly, trying to move with an infant can be a scary proposition. You can only imagine all of the possible scenarios of your baby crawling into things that you’d rather them not get their hands on. And all of this will be going through your brain as you try to unpack your home. One way to get peace of mind is to babyproof your new house before you move in. 

What you can do to get your home ready for your child and family:

1. Make a plan — Before you do anything else, it’s necessary to make a plan for how you are going to babyproof your home. Talk to your movers beforehand. Longtime, professional movers may offer ideas and it will be helpful for them to know you have a little one so they will be extra cautious. Do a walkthrough of the home (or closely inspect pictures) to find problem areas that need to be addressed. These will include:

    • Stairways or stepdown areas that will have to be blocked off;
    • Entryways where you can install baby gates;
    • Cabinets that will need to be locked;
    • Windows with cords that need to be secured;
    • Electrical outlets that will need to be covered; and
    • Sharp corners that will need to be taken care of.

2. Order your babyproofing items early — When you were making your plan, two of the things we mentioned were cabinets and electrical outlets. Make sure that you count all of these items throughout the house so that you can order outlet covers and cabinet locks. The covers will prevent your child from exploring and sticking something into the outlet. The cabinets are especially important because kids love to explore their surroundings and you don’t want them getting into cleaning supplies or other chemicals that could be harmful. Also, get safety wraps for your window cords. These can be major strangulation threats that should be taken care of immediately.

3. Double check entryways — Another thing you are going to want to do is put up gates in various entryways to prevent your infant from crawling around the house on their own. Most baby gates are adjustable and can be adapted to fit many entryways. However, some of them may be irregular in size or so large that they require a custom gate or a gate extension. We strongly suggest measuring all of the entryways and ordering the appropriate gates for your home.

4. Secure pools (and other drowning risks) — If your home has a pool or a hot tub/jacuzzi, it is imperative that you set up a lock to prevent your child from getting out to them unsupervised. We strongly suggest a door chime/alarm system that will let you know if the exterior door to the pool is opened. (It’s also a great idea to prevent your child from wandering around unsupervised even if you don’t have a pool.) But you should also install locking covers on the toilets. You would be amazed how easily it is for a curious toddler to fall inside and potentially drown even in the smallest amount of water. If you are toilet training your child, you may want to put a simple piece of tape over the bathroom door lock to prevent your child from locking themselves inside by accident.

5. Start with the nursery — When it comes to unpacking your house, there are a lot of theories and suggestions about where you should begin. We recommend that if you have a baby, you should start with the nursery. Ideally, you should set this up completely if you can get into the house a few days before the official move. The earlier you can get this room set up, the better. The nursery will give your child a safe place to stay, rest, and play while you unpack the rest of the house (which can be quite chaotic). If possible, you may also want to get a family member to watch your baby for you on moving day to keep things simpler and keep the little one safe.

You want your house to be more than just a place to hang your hat. It should be a safe home for you and your family starting with day one of your move in. To achieve this, you need to do a little bit of planning and work ahead of your move to ensure that your new home is totally baby proof. But doing this will give you peace of mind and a safe place for your little ones.

Your movers want your family to have a great experience. Be sure to tell your movers ahead of time that you have infants and toddlers they should know about and discuss a plan for the day of the move. 

Crescent Moving & Storage has been in business for over 40 years providing reliable, timely and safe moving services for businesses and homeowners in the Vancouver area. Find out why so many trust Crescent Moving to care for their most valuable assets. Contact us for a FREE , no-obligation moving quote.


Moving Best Practice During the Pandemic

Right now, millions of people around the world are on lockdown because of the COVID-19 pandemic. Unfortunately, it isn’t always possible to put everything on hold until a vaccine is found for the virus. For some people, this includes having to relocate, whether it be for family or business reasons. However, as with anything during this uncertain time, moving is something that has to be done with a large dose of caution. 

Here’s a guide to how you can move during a pandemic while staying as safe as possible:

  1. Follow the Rules — The first thing that should inform every part of your move is following the proper CDC guidelines. This means that during the moving process, you should stay at least six feet away from everyone else. You should also wear a mask to prevent the spread of the virus in case someone in your group is infected but asymptomatic.


  1. Extra Moving Supplies — If you’ve moved before, then you know that you have to include lots of tape, boxes, and bubble wrap (or similar padding for breakables.) But with COVID-19, you have some other things that you need to pack along. Namely, you’re going to want a disinfecting spray (such as Lysol), soap, hand sanitizer, and disposable rubber gloves (such as surgical gloves). These are going to be incredibly important as you move into your new home.


  1.  Get New Boxes — Those of us who have made a career (or at least it seems that way) out of moving to new homes with regularity have probably gone for the cheap solution when it comes to boxes. Namely, we stake out the dumpsters in grocery and liquor stores for the packages that are tossed into the recycling. However, this isn’t going to be the safest bet with COVID-19. Instead, opt to buy the new boxes fresh out of the packaging that you can find at your nearest shipping or packing store.


  1. Disinfect EVERYTHING — Even if you buy brand new boxes, we still suggest not leaving anything to chance. This means you should disinfect everything that you plan on coming into contact with. Be sure to visit your new home before you begin moving in. Clean the house from top to bottom, thoroughly disinfecting all of the surfaces. You have no idea who has come in contact with these surfaces in the days leading up to your move, so better safe than sorry. The point is that if you can’t smell the disinfectant in the air, you probably haven’t cleaned it enough.


  1. Consider Buying an Air Purifier — When you’re getting ready to move into your new home, you want that home to be clean. Now, we already told you to disinfect everything in the house, but you can also consider buying a HEPA air purifier for the new home and leaving it running for a time before you move in. This can help clean the air and possibly remove COVID particles from the air. If a purifier isn’t an option, at least leave the windows open to air out any trapped particles in the house (and clear out the smell of the disinfectant).


  1. Be Careful on Move Day — When the big day finally rolls around, you should adhere to all of the requirements set aside by the CDC. Wear your mask at all times. If you have gloves on, then don’t touch your face (especially the eyes or nose) at all. If you take off your gloves for any reason, clean your hands with sanitizer and then put on a new pair of gloves. If you don’t have gloves available, wash your hands regularly. 


  1. Be Careful Who You Invite Over — It’s a time-honored tradition to recruit your friends to help you out with the moving process. But with there being a lot of worries about who may (or may not) have COVID-19, it is important to be careful with who you ask to help. This is where hiring a professional mover is a great idea. You want to make sure you’re asking your movers how they plan to keep safe and keep you safe while moving your items into your new home. They will be prepared to move using best practices.


  1. No Contact Post-Move Dinner — Another big tradition with the move is the post-move dinner of take-out food from a local restaurant. But when you partake of this tradition, make sure to order from the local restaurant and have it scheduled to be left at your door, so you don’t come in contact with the delivery person. (But, please, leave them a nice tip. They are delivering food during a pandemic after all!)

If you’re forced to have to relocate during this rather scary time in our history, it’s not the end of the world. Just be sure to be careful and disinfect everything and follow the proper guidelines as closely as possible.

The Safety Measures Our Surrey Moving Company Is Taking With COVID-19

Today, there are more than 2200 COVID-19 cases in BC (including Surrey) and at least 3 million cases globally. To slow the spread of the coronavirus, we’ve had to adapt our lives to practice physical (social) distancing. We’re avoiding gatherings, delaying our travel plans, and spending more time at home.


But, you can’t stay home if your lease is ending or you’ve sold your house. So, how can you keep your family safe while moving during the coronavirus?
Luckily, we’ve taken steps to keep everyone safe. Read on to learn about the safety measures our Surrey moving company is taking as well as what you can do to keep your family safe.

We’re Offering Virtual Consultations

For a typical move, we’d come to your house for a pre-move consultation to assess the situation. But with our new coronavirus safety guidelines, we’re now offering and encouraging a virtual option.

At Crescent Moving and Storage, we can handle the consultation over the phone or through an online video conferencing program. This update limits the face-to-face contact between our staff and your family. It will keep everyone safer. If you’re looking for a quote on moving costs, you can fill out the form on our website. We can provide an accurate and no obligation estimate without coming to your house.

Surrey Movers
We’re Monitoring the Health of Our Moving Crew Members

As part of our new guidelines, we’re also telling our crew members to stay home if they have any of the official symptoms of COVID-19. These include fever, cough, trouble breathing, or pneumonia.
We’re also asking our employees to stay home if they’ve traveled outside of Canada in the past 14 days, even if they don’t have any symptoms. 14 days is the length of the incubation period for the virus, according to public health experts.

We’ll also call twice in the days leading up to your scheduled move—48 hours and 24 hours before the move. We’ll ask if anyone in your home is sick or self-isolating since our crew members have to go inside your house. We do this to protect our crew, your family, and our other customers.

We’re Encouraging Proper Hand Hygiene and Disinfecting Surfaces

Public health experts recommend everyone to wash their hands with soap and water for 20 seconds or longer. If water isn’t available, you can use an alcohol-based hand sanitizer. These same hand hygiene guidelines apply to our moving crew.
To help our crew follow these guidelines during the moving process, we’re recommending our customers provide a hand washing area for the crew. Our crew members may also bring hand sanitizer to use.
If it’s possible, designate a sink in your home and provide soap and disposable towels for the crew to use. Disinfect the sink area and throw the towels away after the crew leaves.
We’re also encouraging our customers to disinfect high-touch surfaces like light switches, handrails, and door knobs. You should do this both before the crew arrives and after they leave.
You are also encouraged to use your own pen when signing our paperwork on moving day.

We’re Maintaining Physical (Social) Distance During the Move

You can also expect our crew and staff members to follow physical (social) distancing guidelines. That means keeping at least 6 feet or 2 meters between our crew and customers.
These safety guidelines will protect both your family and our crew members.

More Safety Measures You Can Take to Protect Your Family

While postponing your move is ideal, sometimes it’s not possible. If it’s necessary for your family to move at this time, here are a few extra steps you can take.
These extra precautions are in addition to our own health and safety measures.
1. Limit the Number of People Around During the Move
Another simple way to stay safe during your move is to limit the number of family members in the house. In fact, the Canadian Movers Association recommends having only one or two people in the house when the moving crew is there.
If you have kids or pets, set up an area away from the movers. This can be the backyard or a room that the movers won’t need to access.
Designate one family member to deal with the movers and sign the paperwork. That way you’ll limit your family’s exposure. Plus, the movers can focus on efficiency when they’re not worrying about kids or pets underfoot.

2. Try to Use New Moving Boxes
There’s been evidence to suggest that the coronavirus can live on hard surfaces for several days. That’s why using new moving boxes is ideal.
If you need to go out for moving supplies, try to get everything in one trip. Stock up on cardboard moving boxes, tape, labels, and anything else you might need.

3. Plan the Details of Your Move
If you’re renting an apartment, decide ahead of time how you’ll get the keys to your landlord. See of you can set up a contact-free return.
If you’re moving long distance, have a plan for hotel stays on the way. Understand cancellation policies and what to expect. It’s also a good idea to bring along disinfectant wipes, hand sanitizer, and non-medical face masks.
If you’ll be crossing provinces during your move, make sure you understand the local health and safety guidelines, especially when it comes to Canadian travel. Knowing what to expect when you arrive will take the stress out of the moving process.

Start Preparing for Your Move Today

Moving has always been a stressful event, but it’s even more stressful during the COVID-19 pandemic. The good news is, with the right planning and preparation, you can take away some of that stress.
It’s also never been more important to hire a moving company you can communicate with and trust. If you’re looking for moving services in Surrey, contact us today.

Moving & COVID-19

A Message from northAmerican® Van Lines

Over the past few weeks, the world has experienced a circumstance the likes of which none of us has seen before. The Coronavirus pandemic is not only threatening the fabric of our daily lives, but more importantly, the health of every member of our global community. At this time of uncertainty, we at northAmerican Van Lines, would like to reassure you of the following:

1. We recognize the gravity of this situation and are taking every possible precaution to ensure the safety of our employees, agent family, customers, and clients. More information on the steps northAmerican has taken to protect against the virus can be found here.

2. We are in this together! Communication on both sides is vital to everyone’s safety. We have directed our crews to practice “social distancing”, and we are working to ensure that they have not visited high-risk areas or show any symptoms of illness. Our network can give you the option of performing our pre-move survey virtually. If you are moving, you can help us keep you safe by limiting the number of people in your home during the moving process (packing through delivery) to as few people as possible. Should you or someone in your home have been exposed to the virus”, call your northAmerican agent right away. We’re here to help. We will do everything in our power to be flexible with rescheduling and making your move successful.

3. We’re here and available to help with your moving needs. If you are looking for a full-service mover for yourself or an employee, our agent network of moving professionals is waiting and ready to help. When you’re ready to move or ready to relocate employees, northAmerican will be there to provide the professional, quality service you’ve come to expect.

History has shown that we can come through unbelievable challenges as a nation–and be stronger for it. Let this crisis be no different. Take care of yourself and your family and be safe.

You may also be interested in reading:  A note on Covid 19 and how we are taking care of our community